How to navigate to, select or manage folders and files using the Resource Manager of the Rich Text EditorRefers to the rich text editor window of the Editor control which enables content management for several types of modules such as HTML/HTML Pro module.. The Resource Manager is commonly used for the Image Manager, Document Manager, Flash Manager, Media Manager and Template Manager of the RadEditorThe RadEditor is the default Rich Text Editor (RTE) used in DNN 5.4+. RTE's are used on the edit page of numerous modules such as the HTML/HTML Pro, FAQs, Announcements and Events.. Note: Access to some tools is restricted by role.
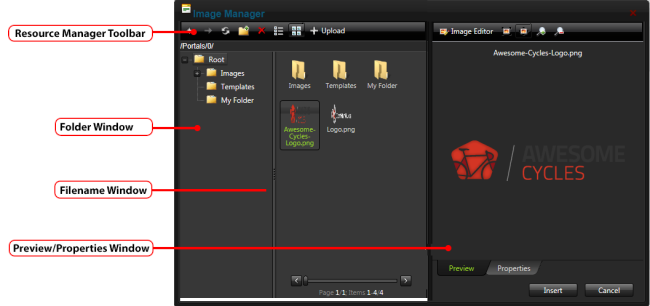
The Resource Manager consists of the following toolbar and windows: Resource Manager Toolbar, Folder Window, Filename Window and Preview/Properties Window.
Resource Manager Toolbar

| Tool | Icon | Description |
|---|---|---|
| Back |
|
Click to go back by one folder in the Folders window. |
| Forward |
|
Click to move forward by one folder in the Folders window. |
| Refresh |
|
Click to refresh to retrieve newly updated files. |
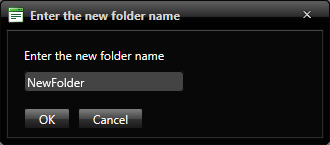
| New Folder |
|
|
| Delete |
|
Select the image or folder to be deleted and then click the Delete |
| Grid View |
|
Click to view the files in the Filename window in a compact grid without thumbnail images. |
| Thumbnails View |
|
Click to view the files in the Filename window with large folder icons and thumbnail images. |
| Upload |
|
Clicking the Upload button to open the Upload dialog box where users can select one or more files to upload and view the settings for uploading files. Note 1: The maximum file size that can be uploaded is listed at the base of the Upload dialog box at Max file size allowed. The default setting is 1,000KB. Attempting to upload a file of a greater size then the following message is displayed "[FileName]: The size of the uploaded file exceeds max size allowed." Note 2: The list of file extensions that can be uploaded is listed at the base of the Upload dialog box at File extensions allowed. Attempting to add a file not listed here the following message is displayed "[FileName]: The extension of the uploaded file is not valid. Please provide a valid file!" The list of allowed file extensions reflects the settings configured for this site by a SuperUserThese users have full access to manage the settings and content of all sites with this DNN installation, including the Host site. SuperUser accounts are created using the Host > SuperUser Accounts module..
Tip: Click the Remove |
Folder Window: This window displays the folders of DAMA Digital Asset Management (DAM) system solves the problem of managing large collections of files by making them searchable and usable. DAM provides the tools for finding, organizing, and searching large collections of files. (AdminRegistered users who are members of the Administrators role. These users have full access to manage the site including adding, deleting and editing all pages and modules. Administrators also have access to the Admin pages located on the main menu. > File Management) using a hierarchical tree structure. A personal folder called "My Folder" is displayed to users allowing them to view and manage their personal images. This personal folder cannot be accessed or edited by other users. Note: SuperUsers don't have a personal folder.
Select a folder to view its sub-folders and/or files in the Filename Window. Folders can be moved by dragging into a different folder. Right click a folder to perform Delete, Rename, New Folder or Upload.
Filename Window: Displays a list of the folders and/or files within the selected folder. Select a file to view a preview and/or properties information in the Preview/Properties Window. Files can be moved by dragging into a different folder. Right click on an image or folder to perform Delete, Rename, New Folder or Upload.
Tip: Click the Collapse/Expand the left pane button to hide/show the Folder Window for additional space to view files details.
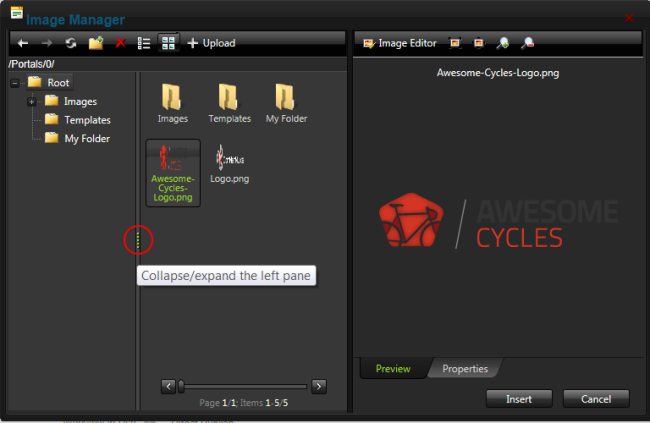
Collapse/Expand the left pane
Preview/Properties Window: Displays a preview and/or properties of the selected file. Properties can be modified as required.